
In my last post I told you that I would write a few lines about my last-minute Christmas projects. This year I had some really last minute projects.. all made the 24th😎 ..
+++ Trovate la versione in Italiano sotto +++
I think this was the first Christmas Eve that my husband spent at home and not at work. Since I have been working with him, my vigils have also been at the shop for the latest deliveries. So for some years our family tradition became: dinner out with the in-laws (always in the same restaurant that we adore) and midnight mass in our old church. Than on Christmas morning we jumped in the car to go to celebrate with my family (and the only idea gives me the warmth of a lit fireplace 😍).
This year, not by choice, everything is skipped .. No dinner, no mass, no relatives .. In all these “no”, however, there was our first December 24th at home (even this not by choice ..) . So for the first time we organized Christmas at our place, just us and the in-laws with a video call with my parents to share the table at least virtually.
This change of plans that at first, let’s face it, I did not take very well.. then led me to give space to some last-minute creativity, because Christmas is Christmas and must be celebrated!
So I made a very fast runner for the Christmas table and the fantasy about the runner gave me the idea to make a centrepiece too. Two quick ideas, which can be replicated and adapted to multiple themes and occasions.
Runner: I had this Scandinavian Christmas-themed fantasy cotton,in the shades of blue and white, with some houses and Christmas trees colored by this small, nice, red stars here and there. It was a perfect match with my white linen with blue stripes tablecloth.
I cut two strips of fabric, 20cm wide as our table is quite narrow, I sewed them together to get the length of the table than edged them in blue. I finished the runner with the overlook machine but you can hemm it or put a decorative trimming on the edges. Runner done! 😊
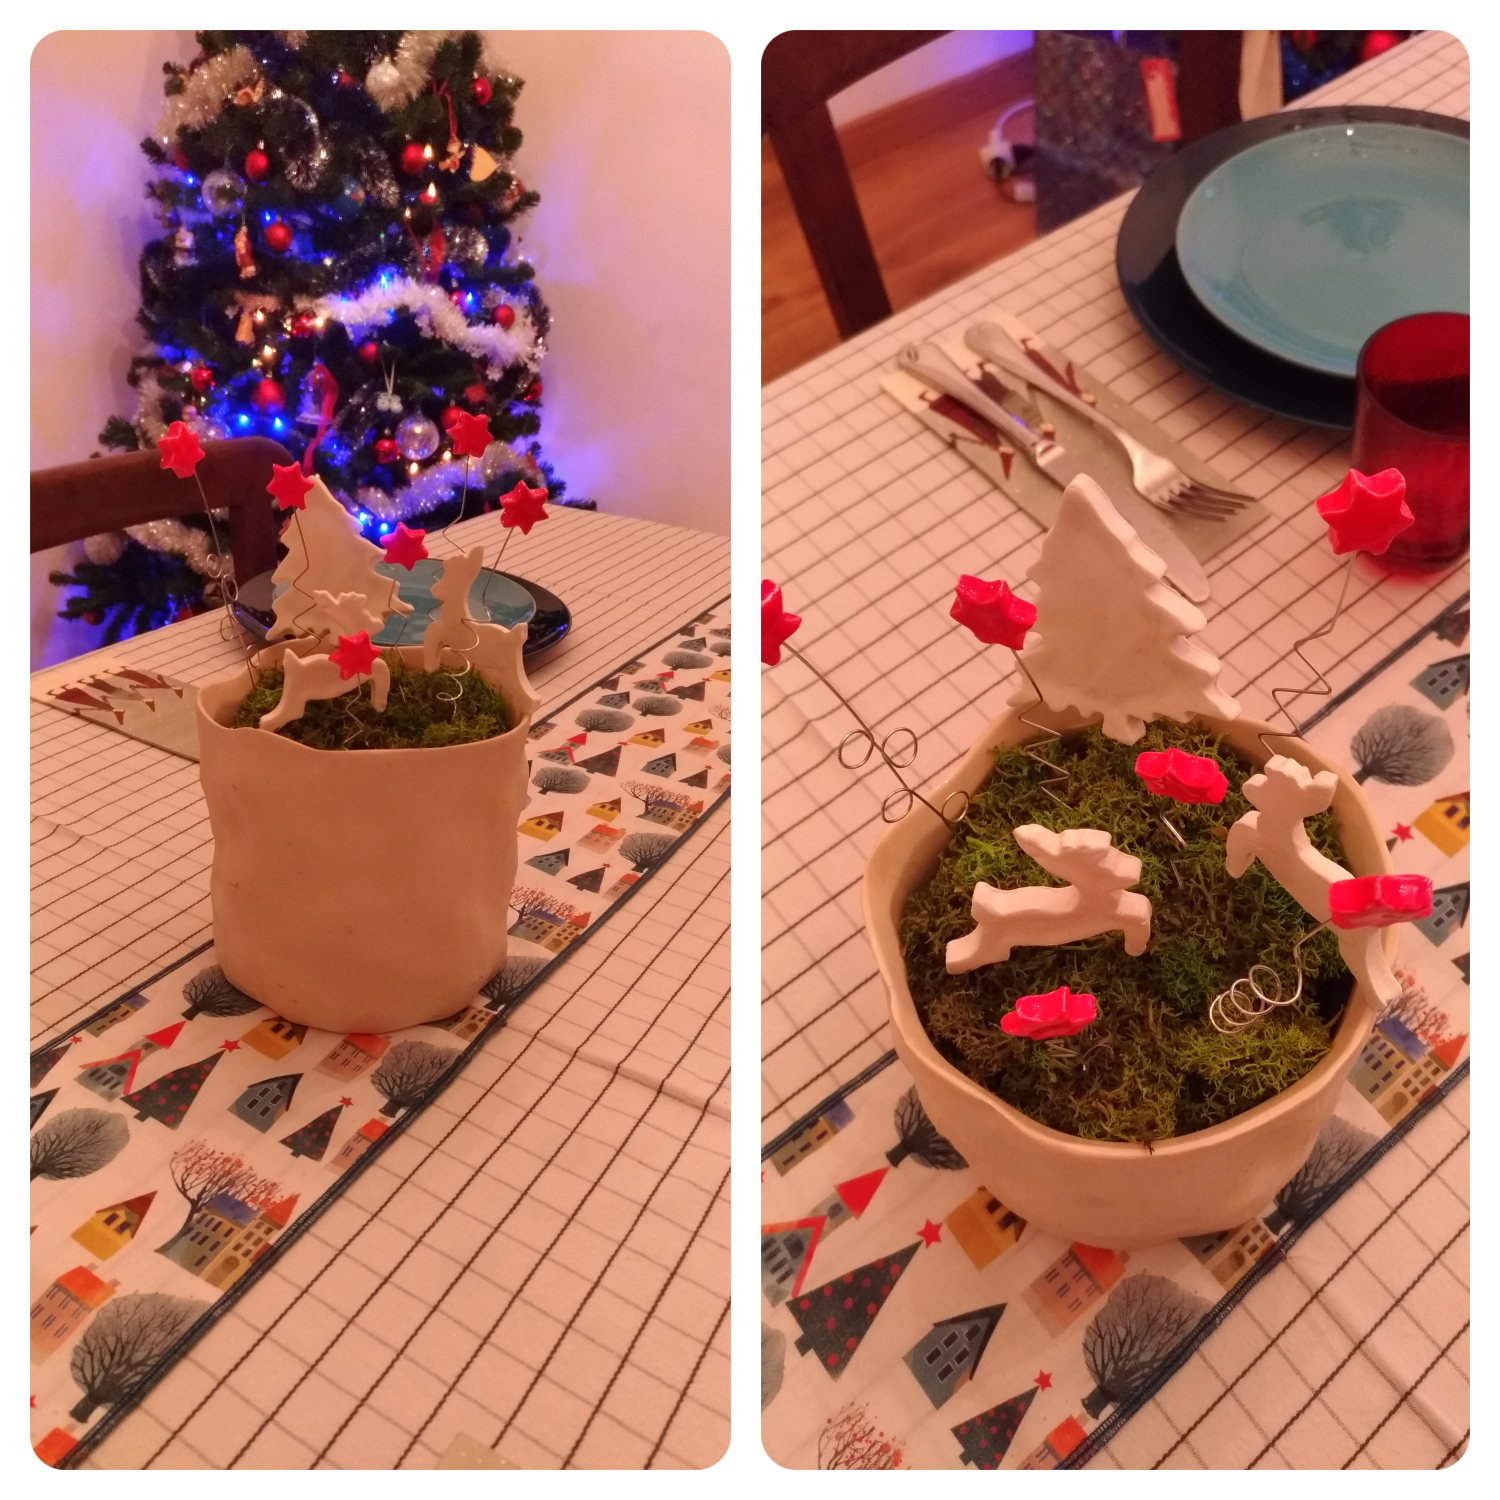
Centrepiece: since a few years ago I made the decorations for the Christmas tree with the DAS I always keep some at home, it is very useful to create place markers, close packs or why not, centrepieces.

I spread out the DAS and cut out some Christmas figures, trees, reindeer and stars. I pierced the bottom of the figures with a thin wire and let it dry.
Once dry, I coloured the stars red to recall those on the runner. I used some nail polish that gave not only the colour but also that beautiful shiny effect.
Once they were dry, I took a vase, put inside a florist’s sponge (or anything else ‘pierceable’) and put in place the figures. On the bottom, to cover the sponge, I put some reindeer moss (you can put whatever you like, gravel, leca, wood, fabric, wool …). Centerpiece done! 😊
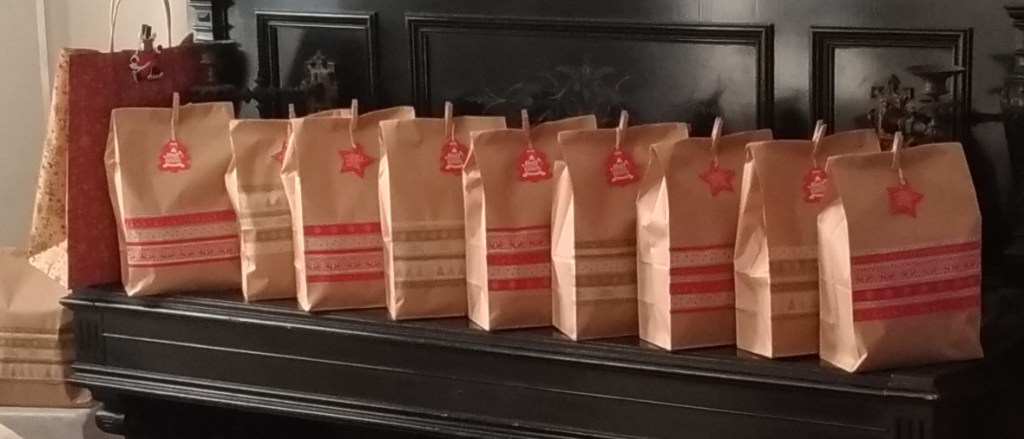
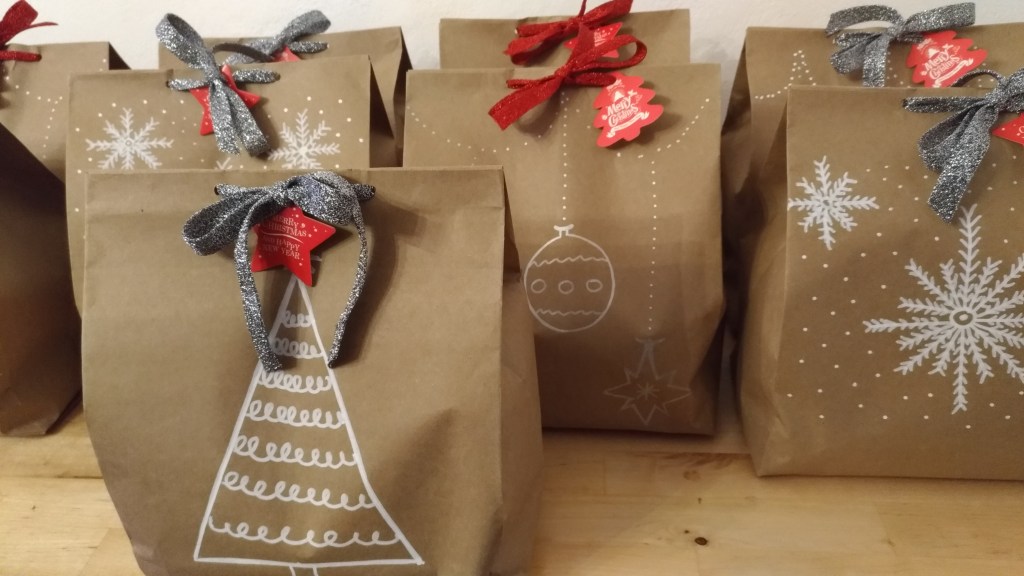
I liked the small stars so much that I also used them to decorate Christmas gift bags. Another of our classic Xmas things ..

For now we have 3 versions, which do you prefer?
-

Washi Tape -

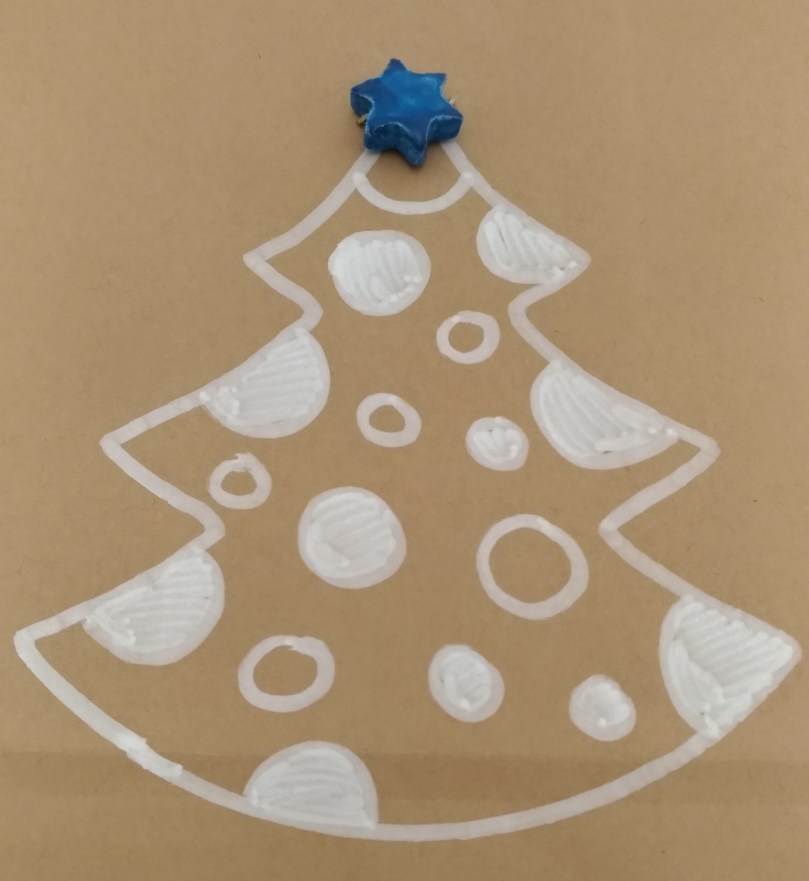
White uniposca designs -

Tree silhouette with DAS star
Below you will find links to some other Christmas projects, let me know if they give you the idea for some nice ideas:
- Children’s drawings to decorate the Christmas tree
- DIY decorations with DAS
- A soft background for the nativity scene
- Gift bags decorated with Washi Tape
- Owls marks place for good luck
+++ ITA Version +++
Nell’ultimo post vi avevo detto che avrei scritto due righe sul Natale, o meglio, sui miei progetti natalizi dell’ultimo minuto. Quest’anno mi sono superata, sull’ultimo minuto non sui progetti, tutto in volata in 24 dicembre.
Credo che questa sia stata la prima vigilia di Natale che mio marito ha passato a casa e non al lavoro e da quando lavoro con lui anche le mie vigilie sono state in laboratorio per le ultime consegne e non a casa. Da qualche anno il nostro rito familiare era: cena fuori con i suoceri (sempre nello stesso ristorante che adoriamo) e messa di mezzanotte nella nostra vecchia chiesa. La mattina di Natale invece si saltava in macchina per andare a festeggiare con la mia famiglia (e solo l’idea mi avvolge di calore come un caminetto acceso 🤗 ).
Quest’anno, non per scelta, è saltato tutto.. Niente cena, niente messa, niente parenti.. In mezzo a tutto questo niente però c’è stato il nostro primo 24 dicembre a casa (anche questo non per scelta..). Così per la prima volta abbiamo organizzato Natale da noi, solo noi e i suoceri con collegamento a casa per salutare i miei e condividere la tavola almeno virtualmente.
Questo cambio di piani che all’inizio, ammettiamolo, non ho preso benissimo mi ha poi portato a dar sfogo alla creatività dell’ultimo minuto, perché Natale è Natale e va festeggiato !
Così ho fatto un velocissimo runner per la tavola di Natale, la fantasia sul runner mi ha poi dato lo spunto per realizzare anche il centro tavola. Due idee veloci veloci, replicabili e declinabili su più temi 😉
Runner: avevo in casa questo cotone fantasia a tema natalizio, un po’ scandinavo, toni dell’azzurro e bianco casette ed alberi di Natale impreziositi e colorati da alcune stelle rosse qua e la. Perfetto per animare un po’ la tovaglia di lino bianca rigata in azzurro.
Ho quindi tagliato due strisce di stoffa di 20cm di larghezza (il nostro tavolo è piuttosto stretto) le ho cucite insieme per ottenere la lunghezza del tavolo e le ho bordate in azzurro (io le ho finite con la taglia e cuci ma potete orlarle o mettere una passamaneria decorativa sui bordi).
Runner fatto 😊

Centrotavola: da quando qualche anno fa ho realizzato i decori per l’albero di natale con il DAS ne tengo sempre un pacchetto in casa, è utilissimo per realizzare segna posti, chiudi pacco o perché no, centrotavola.
Ho steso il DAS e tagliato alcune figure natalizie, alberi, renne e stelle.
Ho forato sul fondo le figure con un fil di ferro sottile e lo ho fatte asciugare. Una volta asciutte ho colorato le stelle di rosso per richiamare quelle sul runner. Ho usato dello smalto per unghie che ha dato altre al colore quel bell’effetto lucido.
Una volta asciutte ho preso un vaso ci ho messo all’interno della spugna da fiorista (o qualsiasi altra cosa ‘bucabile’) e ho posizionato le figure. Sul fondo per coprire la spugna ho messo del muschio da modellismo (potete metterci quello che preferite, ghiaia, leca, legno, stoffa, lana…).
Centrotavola fatto 😊!
Le stelle smaltate mi sono piaciute così tanto che le ho utilizzate anche per decorare i sacchetti dei regali di Natale. Un altro nostro grande classico..
Per ora ne abbiamo 3 versioni, quale preferite?
-
Washi Tape 2018 -
Decorati a pennarello 2019 -

Decorati a pennarello + stella DAS 2020
Visto che quest’anno le nostre tradizioni sono “saltate” abbiamo pensato di introdurne una nuova, a casa nostra le luci, l’albero ed il presepe ci faranno compagnia fino alla ‘Candelora’ (2 febbraio). Ho letto che una volta si usava, mantenere le luci del natale accese fino alla giornata di celebrazione della luce e abbiamo pensato fosse bello, accompagnare questo nuovi anno fuori dal buio dell’inverno..
Qui sotto trovate i link ad alcuni altri progetti di Natale, fatemi sapere se vi saranno d’ispirazione:
- I disegni dei bambini per decorare l’albero di Natale
- Le decorazioni fai da te con il DAS
- Uno sfondo morbido per il presepe
- Sacchetti regalo decorati con i Washi Tape
- Gufetti segna posto porta fortuna
