..after the wood, please welcome the cardboard one!
+++ Trovate la versione in Italiano sotto 🇮🇹 +++
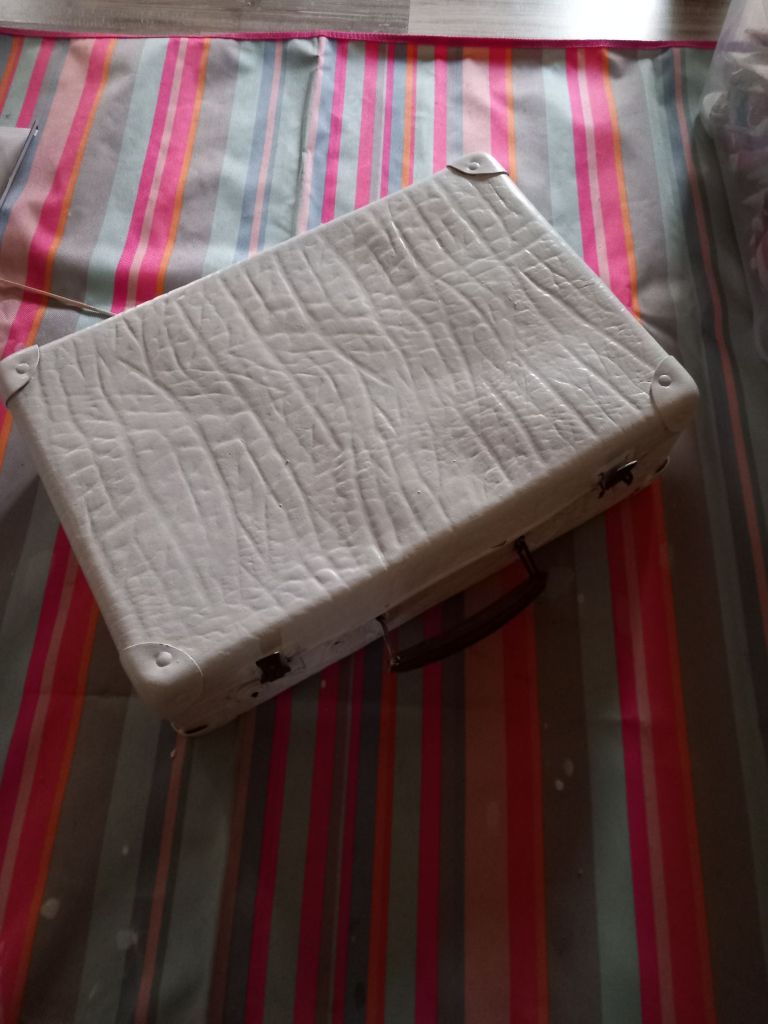
I’m pretty sure I’ve found it in a vintage market years ago, but I cannot remember where it was… The only thing I know for sure is that it was in such bad shape that I got it for a few euros. Unfortunately the “before” photos were lost so you have to immagine the really sad brown of the exterior as in the first photos I had already cleaned the suitcase and started painting the outside with white water-based enamel (the same one I used for the inside of the house door)
Once I had painted the outside I moved on to the inside, I used waxed cotton as I always do when I want to decorate a surface quickly and making sure it remains washable. I used the same technique for the table drawers and the dining room china cabinet.
However, I couldn’t “see it finished” I didn’t know how to work on the details. I wasn’t sure how to continue, than, the idea: gold leaf! I started to love it thanks to Daniel Bland, I found him on Instagram but you can see his work on his website too (www.bland-design.co.uk/). So, what a better opportunity to try it?! I did some testing to understand how it worked, then I started decorating the outside of the suitcase.

I only covered the details, reinforcements on the corners, closures, handle. I really like the contrast with white paint.

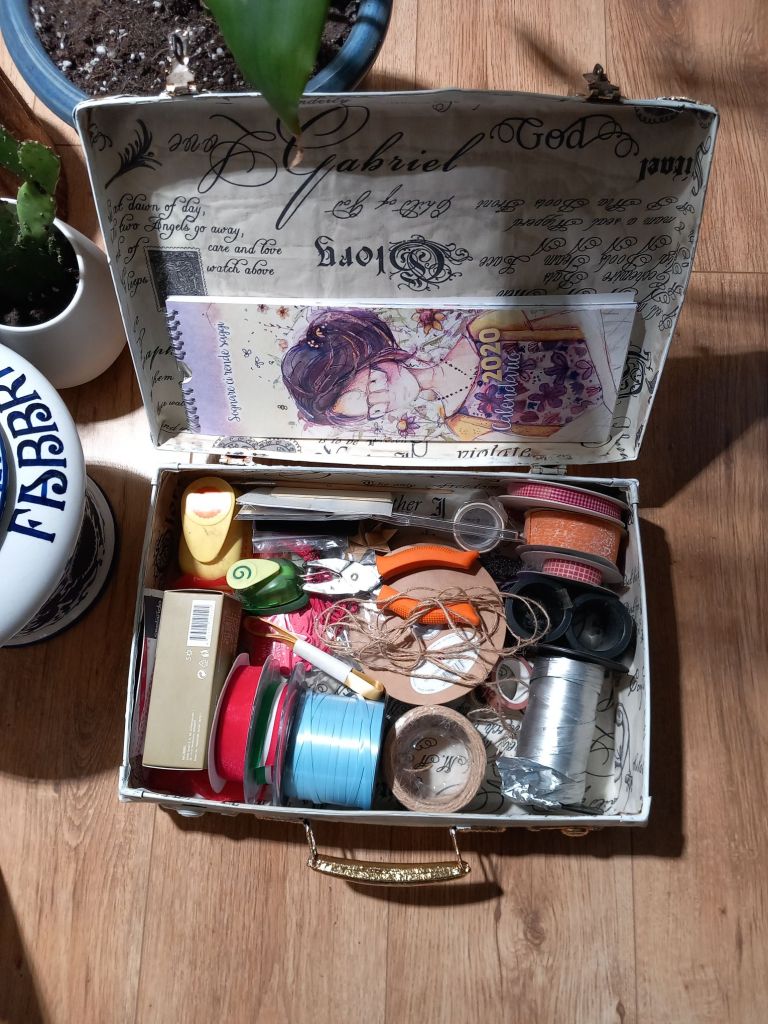
I’ve already filled the suitcase with ribbons and colored papers and put it together with the other one; now they are my little portable stationery 😅
+++ Ita Version 🇮🇹 +++
E dopo la versione in legno, ecco a voi la valigia di cartone!
Trovata nell’immancabile mercatino anni fa, stento quasi a ricordare dove è quando è stata comprata, ma era messa talmente male che credo di averla presa veramente per pochi euro.. Purtroppo le foto del “prima” sono andate smarrite. Quando si dilatano troppo i tempi dei progetti capita.
Dovremo accontentarci quindi di un prima parziale. Avevo già ripulito la valigia ed iniziato a pitturarne l’esterno con dello smalto bianco all’acqua (lo stesso che ho usato per l’interno della porta di casa)

Una volta pitturato l’esterno soni passata all’interno, ho usato il cotone cerato come faccio sempre quando voglio decorare una superfice velocemente e facendo in modo che rimanga pulibile, lavabile. Ho usato la stessa tecnica per i cassetti del tavolo e la credenza della sala da pranzo.

Non riuscivo però a “vederla finita” non sapevo come rendere i dettagli. Non avevo bene in mente come continuare. In questi giorni però ho avuto l’idea. Volevo provare ad usare la foglia d’oro, me ne sono innamorata seguendo su Instagram Daniel Bland (www.bland-design.co.uk/) quale occasione migliore!! Ho fatto qualche prova per capire come funzionava e poi ho iniziato a decorare l’esterno della valigia.

Ho trattato solo i particolari, rinforzi sugli angoli, chiusure, maniglia. Lo stacco con il bianco mi piace moltissimo. Ho già riempito la valigia di nastri e carte colorate e l’ho messa insieme all’altra. Sono la mia piccola cartoleria portatile 😅