One of the things I love most is looking at the mountains from the balcony. Sometime I do this sitting on the marble edge… really nice but not so comfortable! So, this year, I’ve decided to put 4 cm of foam rubber between me and the marble 🙂
+++ Trovate sotto la versione in italiano +++
What we need: Fabric (strong and washable), lining, foam rubber (pre-cut), basic sewing kit.
First of all we need to choose the fabric. I’ve used the same cotton treated with resin I’ve used for the backpack. This fabric is perfect for my project as it is light, really strong and easily washed with a wet sponge. As these are not removable pillowcase the last point is really useful.
Draw and cut
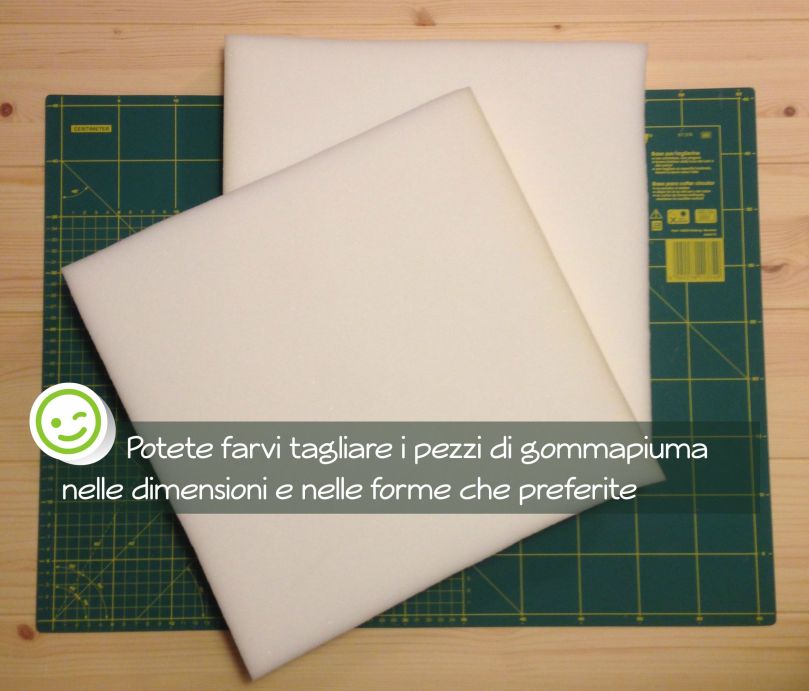
I love foam rubber as you can ask to have it cut in all the sizes or shapes you need, unfortunately it is not so easy to insert it in a pillowcase as foam rubber make friction with fabric during the process. To avoid this we will lining the foam rubber.
This passage will help you especially if you are working on big size or long pillow as the one needed for benches.
This time my pillows are simple 35 cm squares with a 4 cm thickness. Obviously the measures depend on what you need the pillows for.
Draw on the back of your fabric two squares of 80 cm per side (35+35+4+4+seam allowance) and cut them off, than do the same on the lining.

Lining
Pin together the two sides of the lining, right to right, and sew all around on three of the four edges. Reverse.
Insert the foam rubber into the cover and close the open side with small stitches.

Pillowcase
Pin together the two squares of fabric, right side to right side, than sew all around the edges. Leave a hole (about 15 cm) in the middle of one edge.
Now we need to define the corners. Starting with one corner take the seams and lay the fabric as the seams are one on each other and pin. Now measure a width of 4 cm (our foam rubber width), take the seam in the middle, and draw a line. Sew on the line and cut the exceeded fabric. Reverse.

If this is the first time you make corners try dimension and verse of the seams reversing the pillowcase before cutting the exceeded fabric 😉
Done
Put the lined foam rubber in the pillowcase and close the hole with small stitches.
Enjoy your outside pillow ❤

+++ ITA – Version +++
Io adoro stare sulla terrazza di casa ad ammirare le montagne! Spesso lo faccio seduta sul bordo di marmo del terrazzo… Mooolto bello ma non propriamente comodo. Quest’anno ho deciso di mettere 4 centimetri di sana gommapiuma tra me e il marmo. Ovviamente la gommapiuma è stata prima abbellita 😉
Cosa Ci serve: Stoffa, fodera, gomma piuma (già tagliata nella dimensione desiderata), Kit da cucito.
Per prima cosa scegliamo la stoffa. Io ho scelto di utilizzare una stoffa resinata (come quella usata per gli zainetti ). Oltre ad essere una stoffa molto resistente si rivela comodissima per l’esterno visto che può essere pulita usando una spugna bagnata. Trattandosi di cuscini non sfoderabili, ovvero che non hanno cerniere o altre aperture, la praticità è una necessità 🙂 .
Disegniamo e ritagliamo
Le misure ovviamente dipendono dall’uso che si vuol fare dei cuscini. La comodità della gommapiuma è che potete farvi tagliare direttamente in negozio i pezzi nelle dimensioni e nelle forme che preferite.
I miei cuscini sono di forma quadrata e misurano 35 cm di lato per 4 cm di spessore. Disegneremo quindi sul retro della nostra stoffa due quadrati di 80 cm per lato (35+35+4+4+margine di cucitura). La stessa cosa viene fatta sulla fodera.

La gommapiuma fa attrito su praticamente qualsiasi stoffa, per questo la foderiamo, per agevolare l’inserimento della gommapiuma nella fodera esterna. Questo passaggio si rivela utilissimo soprattutto in caso di cuscini molto grandi o lunghi, quelli per le panche ad esempio.
La fodera interna
Partiamo dalla fodera interna fissiamo i due quadrati, dritto su dritto, e cuciamo tutto attorno ad eccezione di uno dei lati. Rivoltiamo.
Inseriamo la gommapiuma nella fodera e chiudiamo il lato aperto con dei punti fitti.

L’esterno
Fissiamo fronte e retro della nostra stoffa, dritto su dritto, con gli spilli e cuciamo tutto attorno rispettando il margine di cucitura. Lasciamo un’apertura, larga circa 15 cm, al centro di uno dei lati.
Ora andiamo a definire gli angoli. Prendete il primo angolo e stendete la stoffa in modo da sovrapporre le cuciture, fissate con uno spillo. Misurate ora 4 cm di larghezza (l’altezza della nostra gommapiuma), 2 a destra e 2 a sinistra della cucitura e disegnate una riga. Cucite sulla riga e ritagliate la stoffa in eccesso. Fate la stessa cosa su tutti e 4 gli angoli. Rivoltate.

Se è la prima volta che lo fate verificate la dimensione ed il verso della cucitura rivoltando la fodera prima di tagliare la stoffa in eccesso 🙂
Chiudiamo
Inserite la gommapiuma foderata all’interno del copricuscino e chiudete l’apertura con dei punti fitti. Godetevi i vostri nuovi cuscini da esterno ❤


Great cushions, but the view – where is it? Here you tempt me with descriptions of the view towards the mountains, yes we don’t see the now to be enjoyed in comfort view. Waah! 😆 New post with view? *hopeful* 🙄
My currents view is not too bad, but I somehow imagine it can’t compare…
LikeLike
You’re right!! I’ll make some photos in the weekend and post them just for you!!😁
LikeLiked by 1 person