
I’m working on a new project that I hope to write about soon and, while working, I realized that I’ve never finished this post on binding that I started sometime ago…
+++ Trovate la versione in Italiano sotto 🇮🇹 +++
I’ve put it aside because there are a thousand photographic and video tutorials that explain much better than I can how to prepare the edge of a blanket and how to sew it.
A few days ago, however, I came across this video, simple but brilliant, in which you can see how to create a border foot for your sewing machine with cardboard (you can find it at the bottom of the article)
I took it as a sign of fate as it was the perfect end of my post. So, here you have it: “how to create the edge of a blanket, or any other project, and fix it with a cardboard sewing machine foot”.
1. Measure the perimeter of your blanket to understand how many meters of borders you will need.
2. Define the height of the edge, double it and add at least 2 cm for the seams.
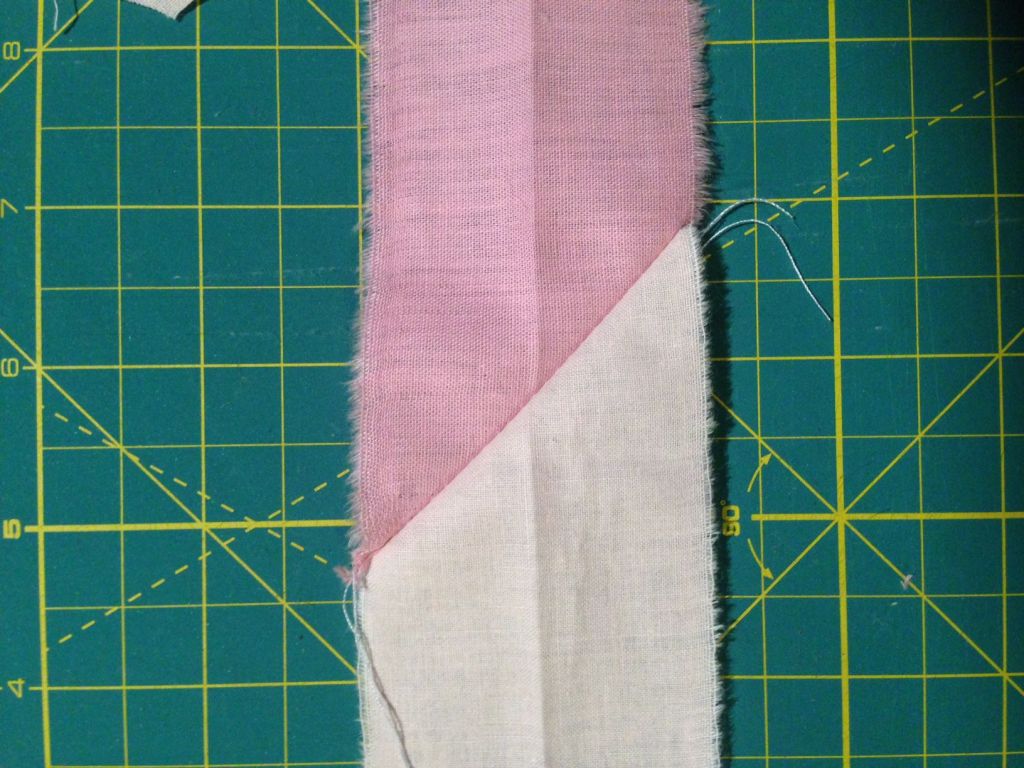
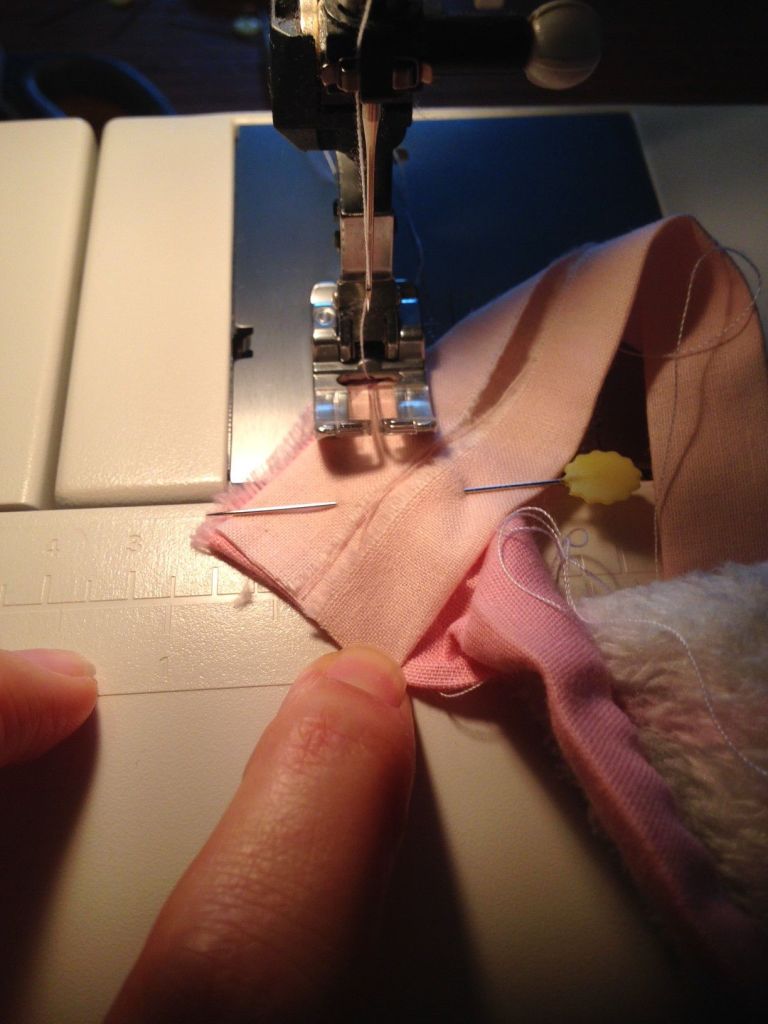
3. Cut ‘n’ strips of fabric of the defined height and start sewing them together on a 45° angle:

4. Cut off the exceeding fabric

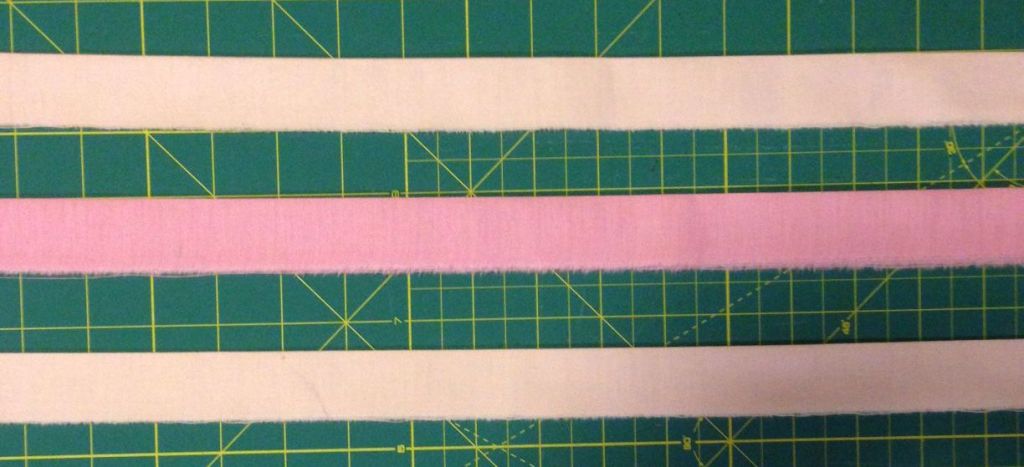
5. Sew all the stripes together
6. Fold the stripe in a half and than fold again the seams edges
7. To secure the edge you can start by pinning it straight to your work with pins, make a first seam, turn up and then sew again. Or, use the sewing machine foot if you have it, if not you can try making it out of cardboard.

8. Secure the two ends of the edge, always overlapping right sides and sew diagonally.
Done!

+++ Ita Version 🇮🇹+++
Ho iniziato a lavorare su un nuovo progetto di cui spero di scrivere a breve e nel farlo mi sono resa conto di non aver mai finito questo post sulle bordure iniziato tempo fa…
In realtà l’avevo accantonato perché esistono mille tutorial sia fotografici che video che spiegano molto meglio di quanto posso fare io come preparare il bordo di una coperta e come cucirlo.
Alcuni giorni fa però mi sono imbattuta in questo video, semplice ma geniale, in cui con un cartoncino si va a creare un piedino per bordura..
L’ho preso come un segno del destino era il completamento perfetto per il mio post. Come crere un bordo, cuocendo più pezzi di stoffa l’uno all’altro e come utilizzarlo grazie ad un piedino di cartone!!
Pronti?
1. Misurate il perimetro della vostra coperta per capire quanti metri di bordure vi serviranno.
2. Definite l’altezza del bordo raddoppiatelo e aggiungete almeno 2 cm per i risvolti.
3. Tagliate n strisce di stoffa dell’altezza definita ed iniziate a cucirle insieme:

4. Tagliate la parte in eccesso

5. Continuate fino a terminare le strisce

6. Piegate a metà e poi ancora il margine di cucitura.
7. Per fissare il bordo potete iniziare fissandolo dritto su dritto al vostro lavoro con gli spilli, fare una prima cucitura, risvoltare e poi cucire di nuovo.


Oppure usare un piedino per risvolti se vi va potete provare a realizzare questo in cartone.
8. Fissate i due capi del bordo sempre sovrapponendo dritto su dritto e cuocendo in diagonale.
