
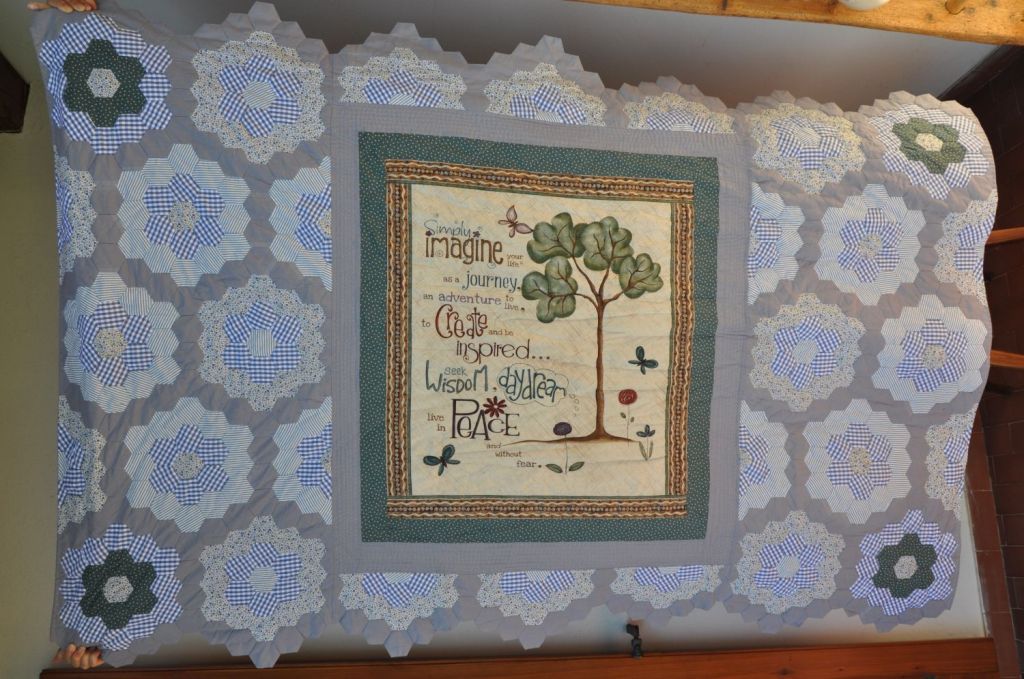
I mentioned this blanket in a post I wrote some weeks ago. I worked on this technique when I travelled every day for work. This blanket, better to say the parts of this blanket, was made quite all on a train.
+++ Trovate la versione in Italiano sotto 🇮🇹 +++
This technique, called “English Paper Piecing,” basically involves creating hexagons with fabric and then joining them together to create more complex designs.
To make sure hexagons are all the same, we use paper models. It’s quite a fun way to spend time, plus since the hexagons are usually small, you can work anywhere.

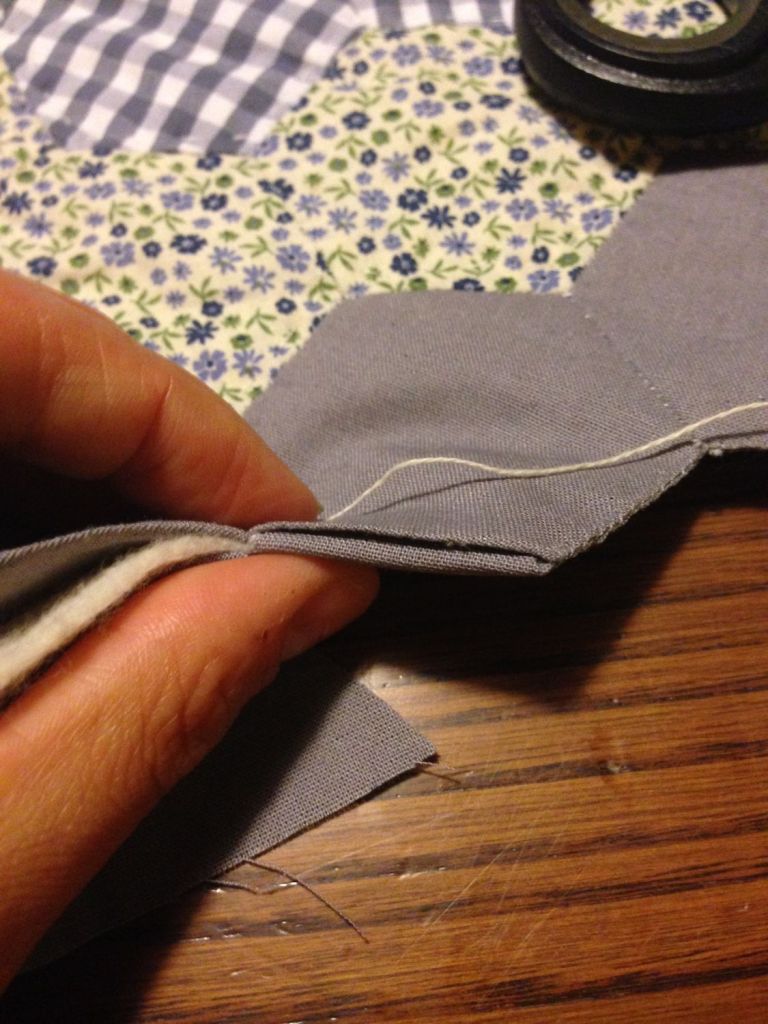
The process is quite simple, cut the fabric to the size of the hexagon plus a comfortable seam allowance, place the paper hexagon on the fabric and fold the edges, fix the fabric with a basting thread on the hexagon itself. Then we proceed sewing the hexagons together. All the pieces are hand sew.
With hexagons you can create many figures, from the simplest, like mine, to the most complex (the web is full of beautiful models).
Once the design has been defined and the hexagons have been assembled, the procedure is the same as for any quilt blanket: padding, “backing” and then binding everything. I chose to finish the blanket following the line of the hexagons (not cutting them to have a straight line).
If you want to try the technique without getting lost in a thousand of hexagons, you can try making something small like the cover of a cushion.
Here below you can find a video tutorial from “Missouri Star Quilt Company” they made reallya nice sewing videos.
At the bottom, after the Italian version, you can find two more videos, one very simple on the basic technique and the other with a clever idea for placing the exagons.
+++ Ita Version 🇮🇹+++
Ne ho accennato in un post scritto tempo fa parlandovi delle copertine che avevo fatto per le gemelle di un’amica. È una delle tecniche che ho provato quando viaggiavo per lavoro tutti i giorni. Si può dire che questa coperta, o almeno le sue parti, siano state realizzate in ore di treno.
In sostanza si tratta di confezionare con la stoffa tanti esagoni da unire poi per creare disegni più o meno complessi. Per realizzare gli esagoni tutti uguali si parte da dei modelli in carta (credo sia per questo che la chiamano “paper piecing” ).
Inizialmente è tutto molto divertente, in più essendo gli esagoni piuttosto piccoli si può veramente lavorare ovunque. Con il tempo ci si rende conto della mole di esagoni necessari per creare una coperta e il divertimento un pochino cala..

Il processo in se è semplice, si taglia la stoffa della dimensione dell’ esagono più un margine comodo di cucitura, si sistema l’esagono sulla stoffa e si ripiegano i bordi fissandoli con un filo da imbastitura sull’esagono stesso. Poi si procede cuocendo gli esagoni tra loro. Tutti questi passaggi sono cuciti a mano.
Con gli esagoni si possono realizzare moltissime figure, dalle più semplici, come le mie ad altre ben più complesse (il web è pieno di modelli bellissimi). Molti video tutorial sono in inglese ma risultano estremamente esplicativi anche senza audio.
Una volta definito il disegno ed assemblati gli esagoni il procedimento è quello classico, imbottitura, retro e poi si borda il tutto. Io ho scelto di finire la coperta non dritta ma seguendo la linea degli esagoni.
Se vi va di sperimentare la tecnica senza perdervi in mille esagoni potete provare a realizzare qualcosa di piccolo come la fodera di un cuscino.
Vi metto qui sotto i link ad alcuni video tutorial che mi sono sembrati ben fatti. Uno da proprio le basi della tecnica, l’altro un trucco carino per la progettazione.
